
Step 1: Download the ILDAC-32 app from the App Store or Google Play
Step 2: Plug in ILDAC-32 into any 5volt USB port or power supply. Connect ILDA cable to ILDAC-32 and projector. When initially powered up, a default test pattern should be running on the projector.
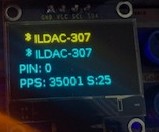
When connecting via BT, the device name and the PIN will be displayed in the OLED display on the ILDAC-32 during startup.
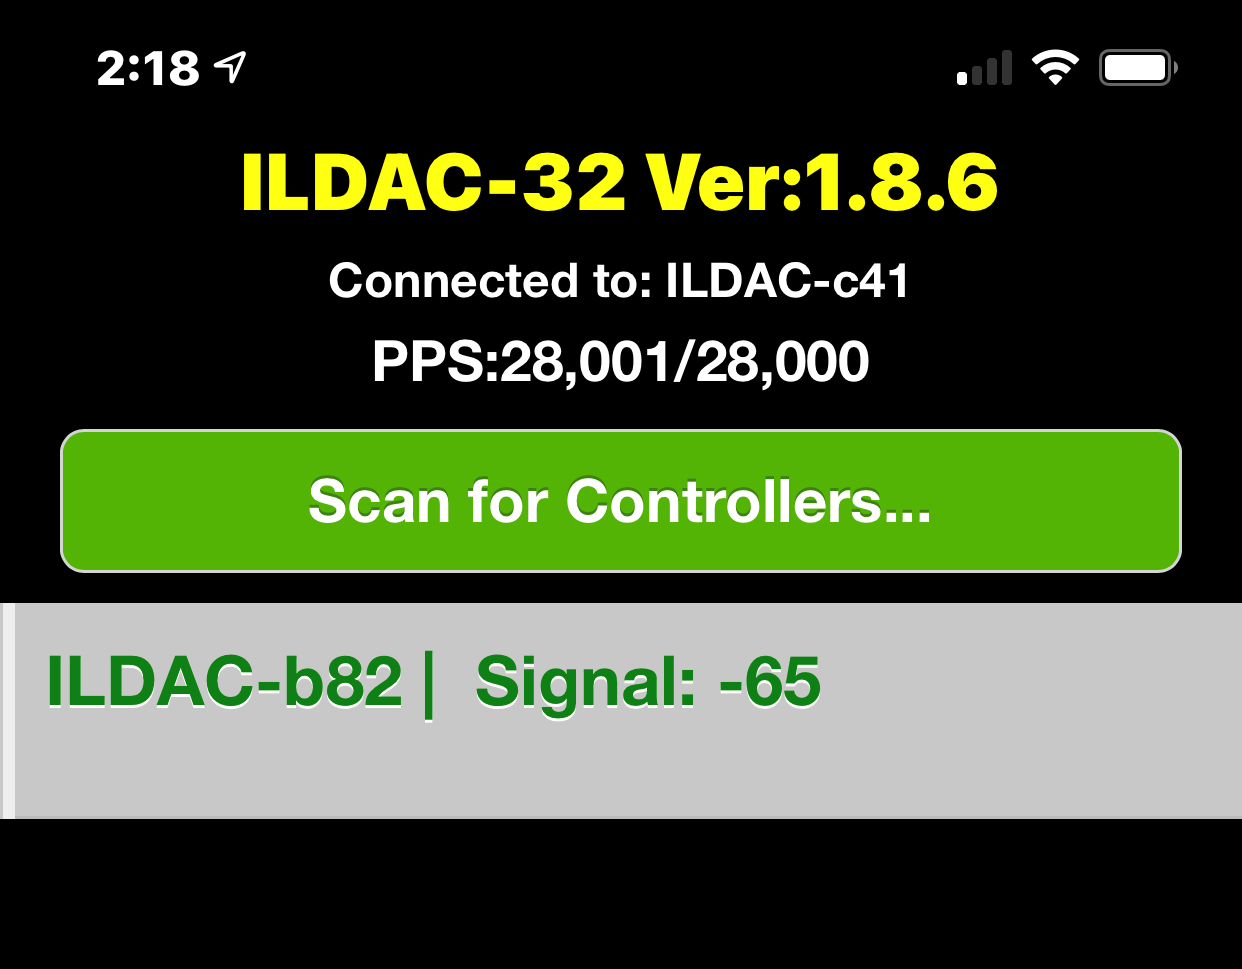
Step 3: Connect via Bluetooth first: Open up the app and you should see the ILDAC name listed under the "Scan for controllers" button like below. Click the grey bar to connect to ILDAC-32:
Step 4: Enter the Bluetooth PIN/passcode. The factory default passcode is: 1234. The PIN/passcode will be visible in the OLED display on the unit.

Once logged in, the main app menu should appear as below.
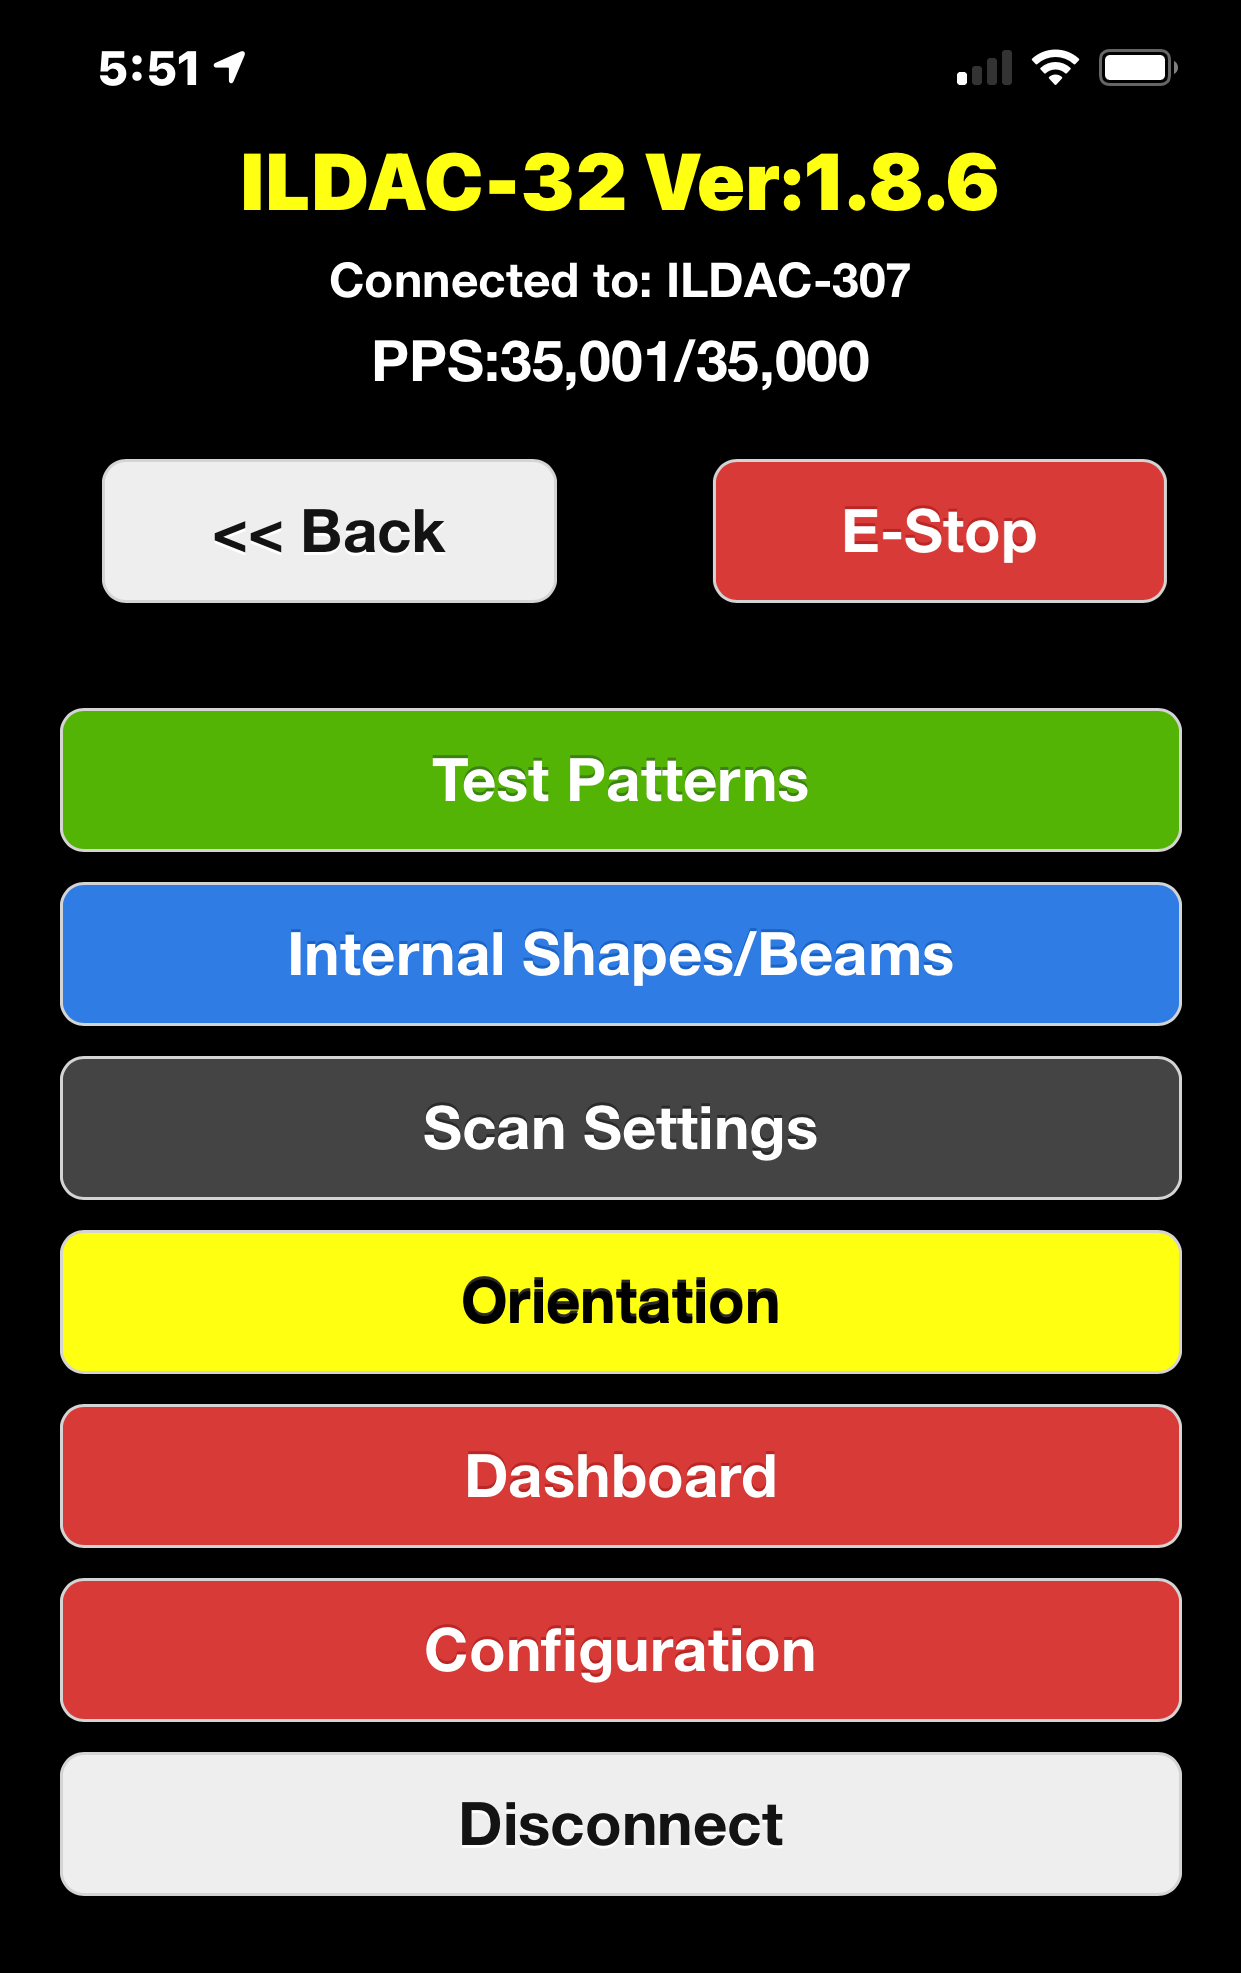
You can now select different test patterns or adjust other projector settings.
Step 2: Plug in ILDAC-32 into any 5volt USB port or power supply. Connect ILDA cable to ILDAC-32 and projector. When initially powered up, a default test pattern should be running on the projector.
When connecting via BT, the device name and the PIN will be displayed in the OLED display on the ILDAC-32 during startup.
Step 3: Connect via Bluetooth first: Open up the app and you should see the ILDAC name listed under the "Scan for controllers" button like below. Click the grey bar to connect to ILDAC-32:
Step 4: Enter the Bluetooth PIN/passcode. The factory default passcode is: 1234. The PIN/passcode will be visible in the OLED display on the unit.
Once logged in, the main app menu should appear as below.
You can now select different test patterns or adjust other projector settings.
To enable and connect via Wifi, connect via the Bluetooth app above first, then follow these steps below.
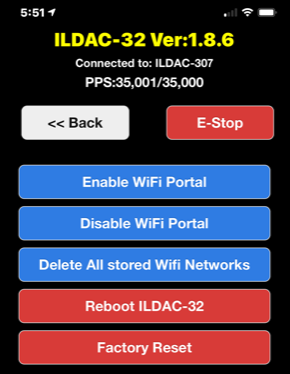
Go to the "Configuration" page in the Bluetooth app and click "Enable Wifi Portal".
This will turn on the Wifi radio in the ILDAC-32 and reboot the device. Upon reboot, look at the OLED screen for the internal Wifi SSID and password credentials, like below
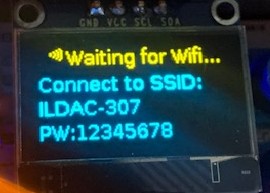
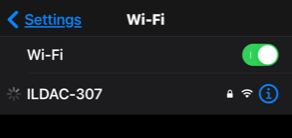
Go to your mobile device (or Mac) and connect to the "ILDAC-xxx" SSID and password (default password is: 12345678 and can be changed later)
Once you are connected to the internal Wifi network, you'll see a captive login page like below. Click on the ≡ ("hamburger") icon (top right):
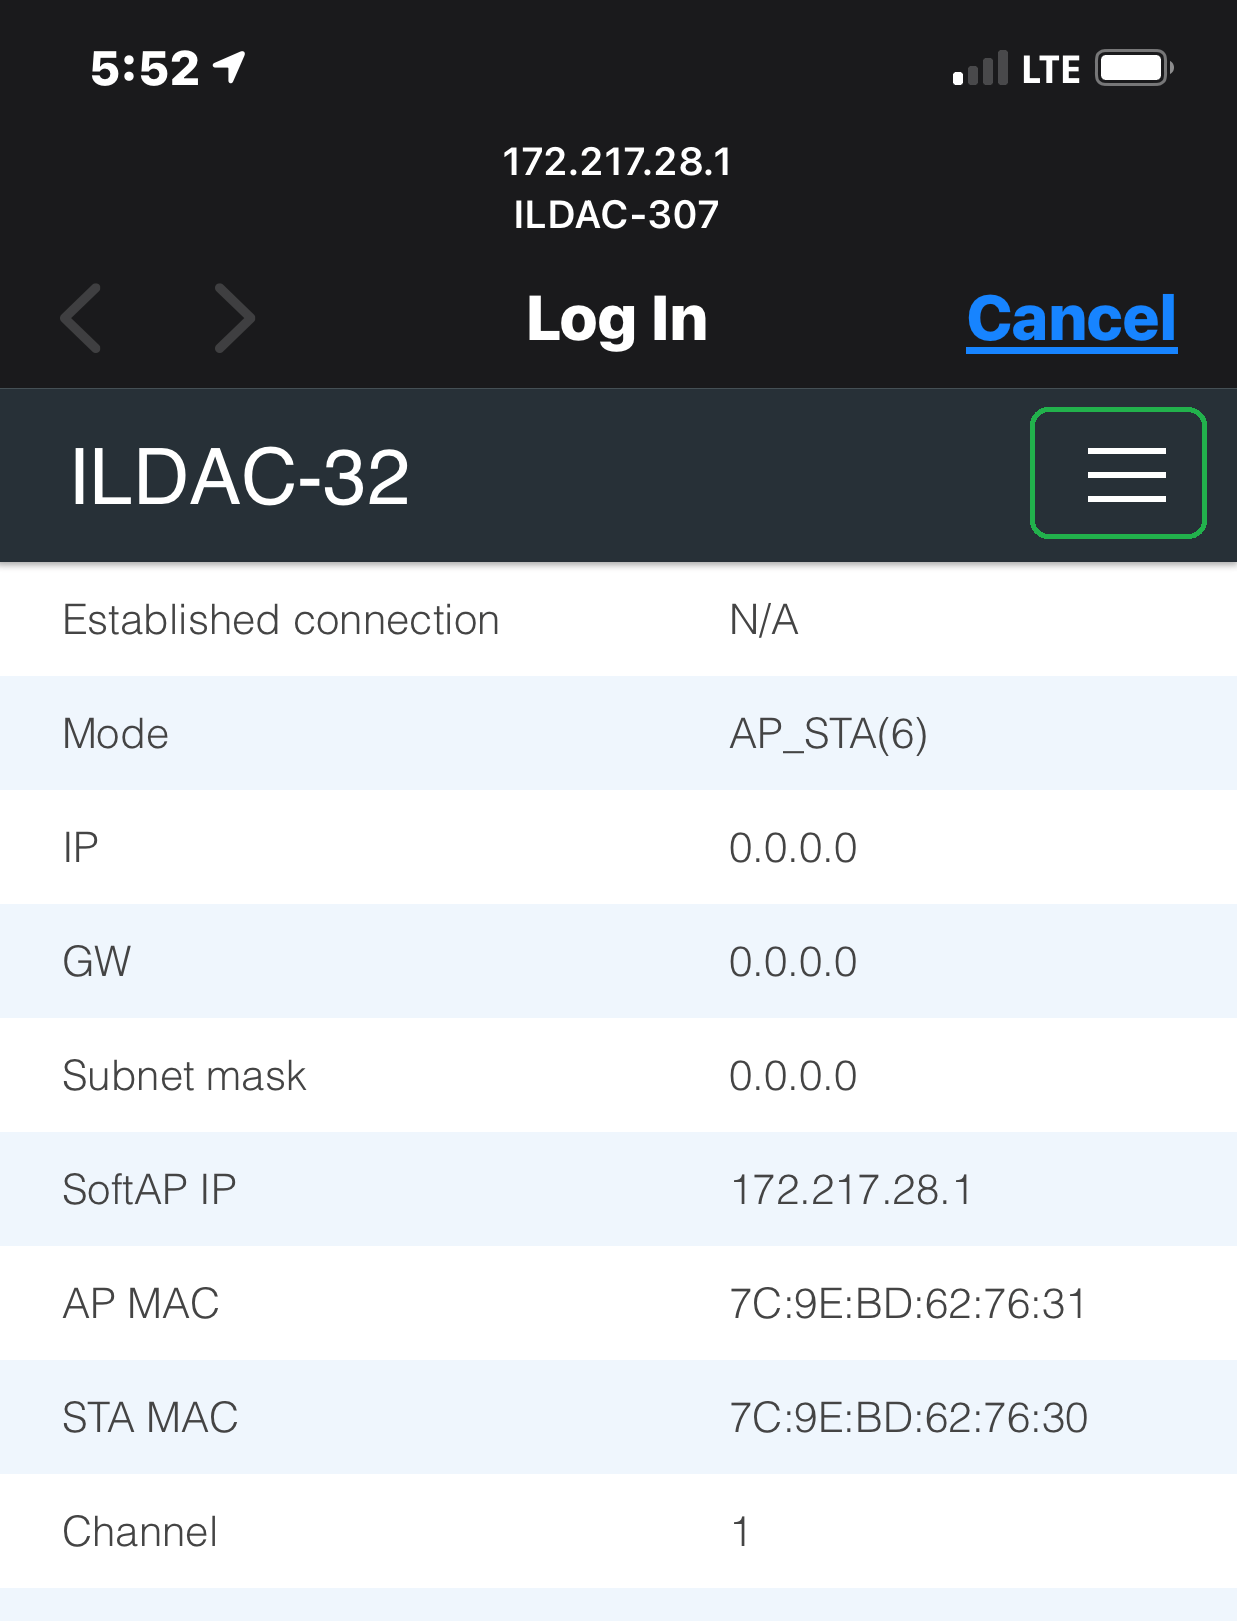
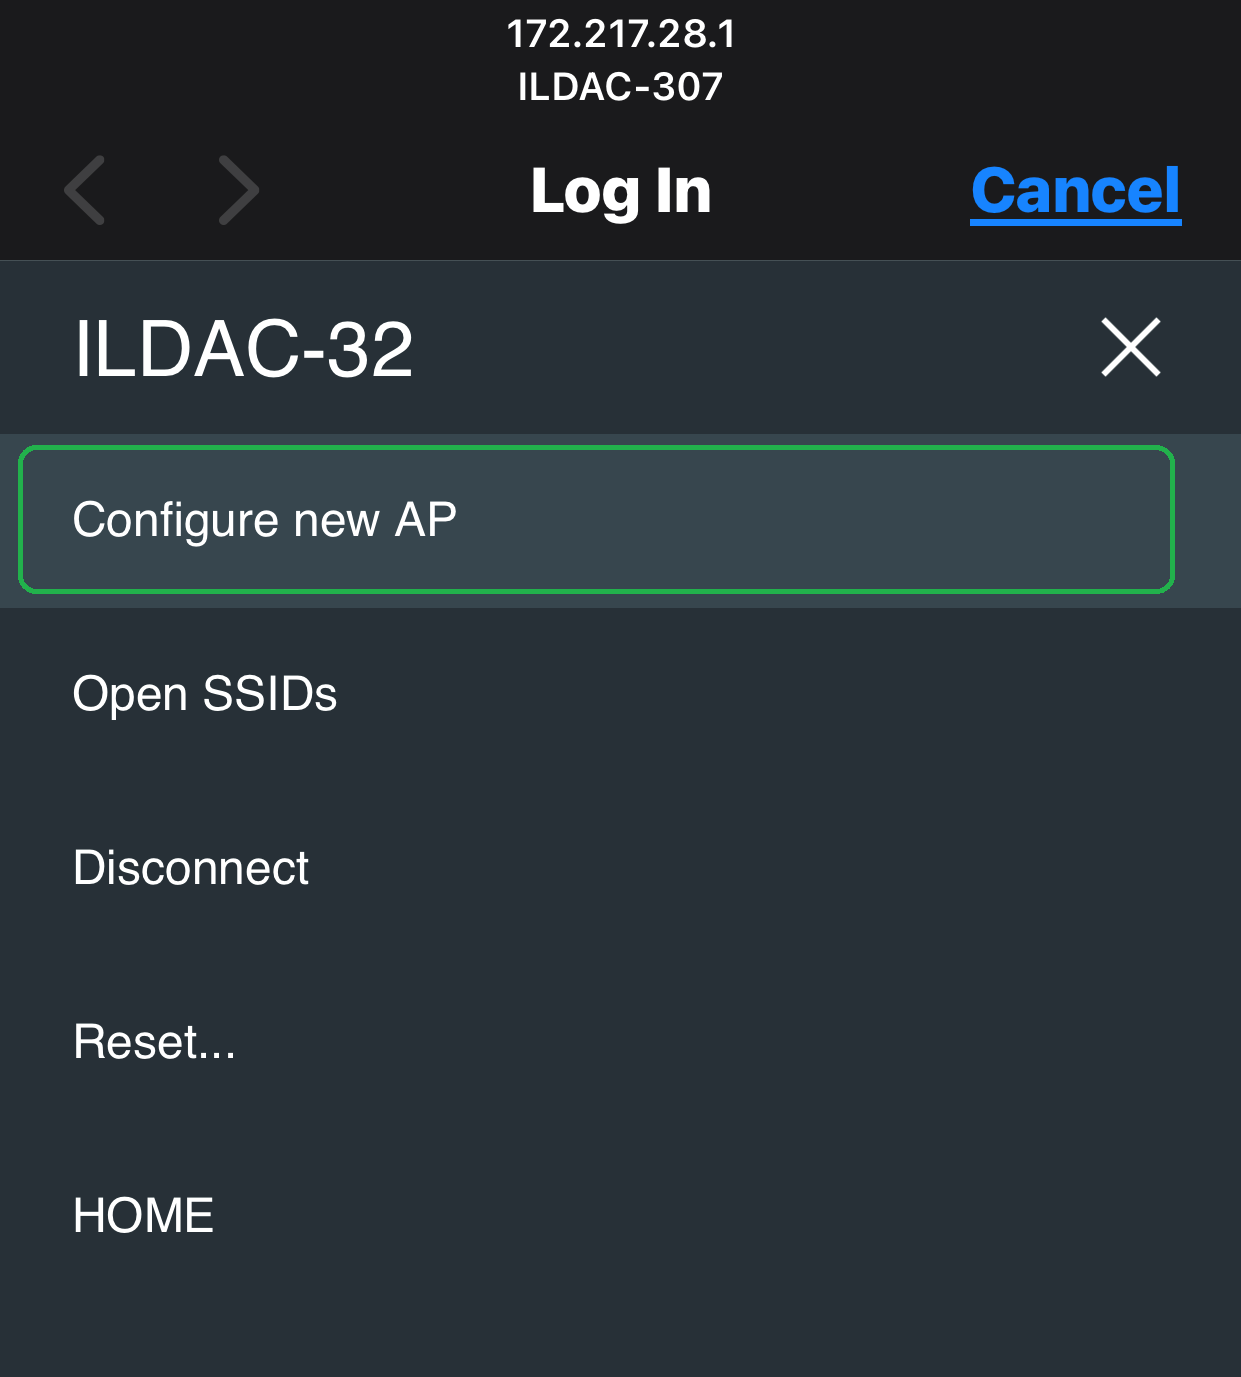
Select "Configure new AP":
After 30-45 seconds or so, a list of local Wifi networks/SSIDs should appear.
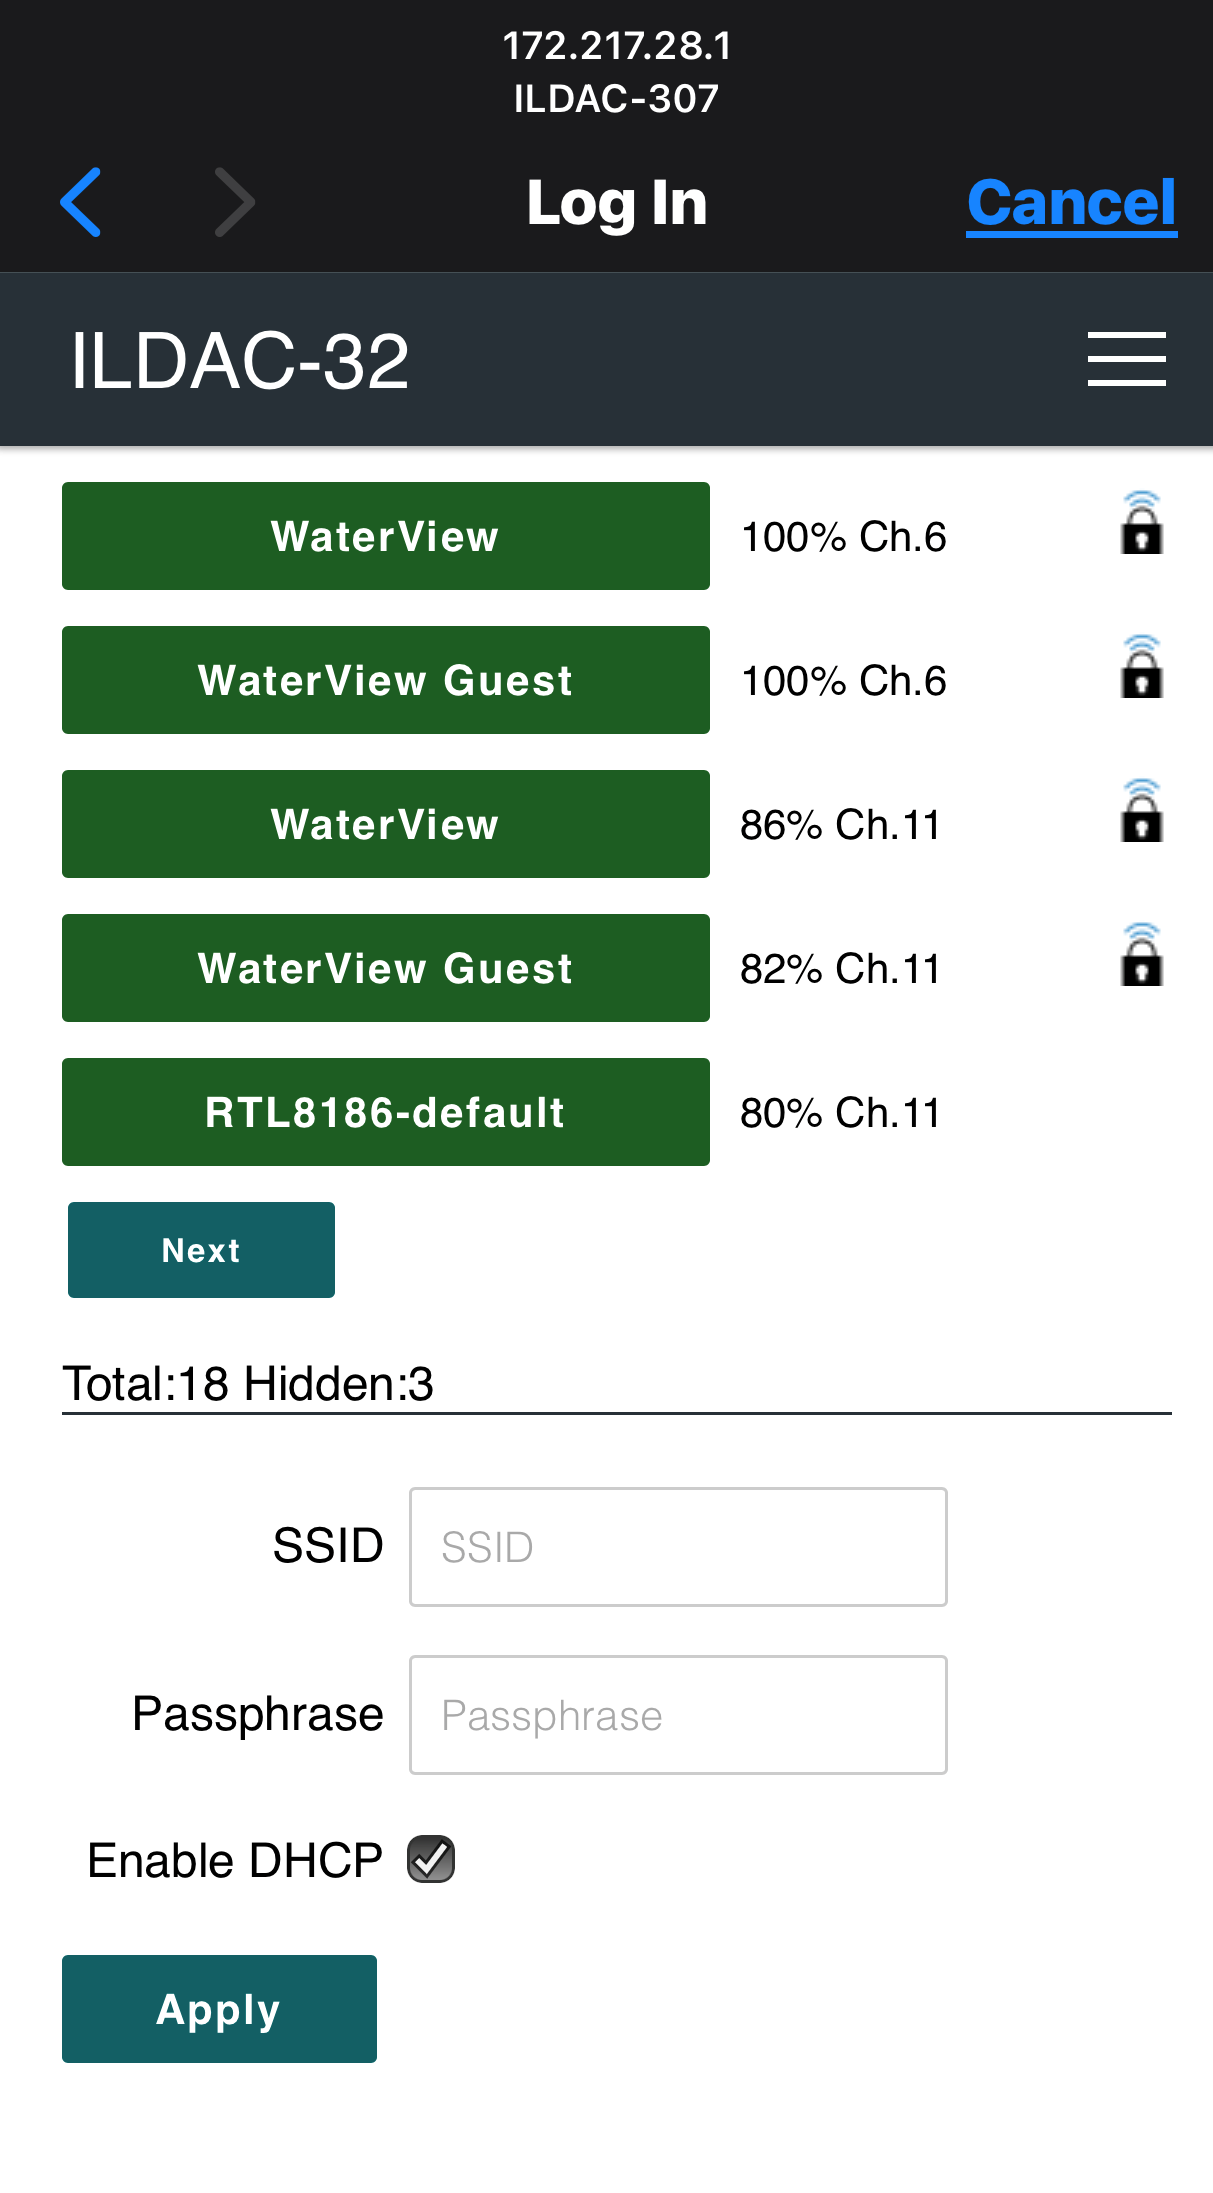
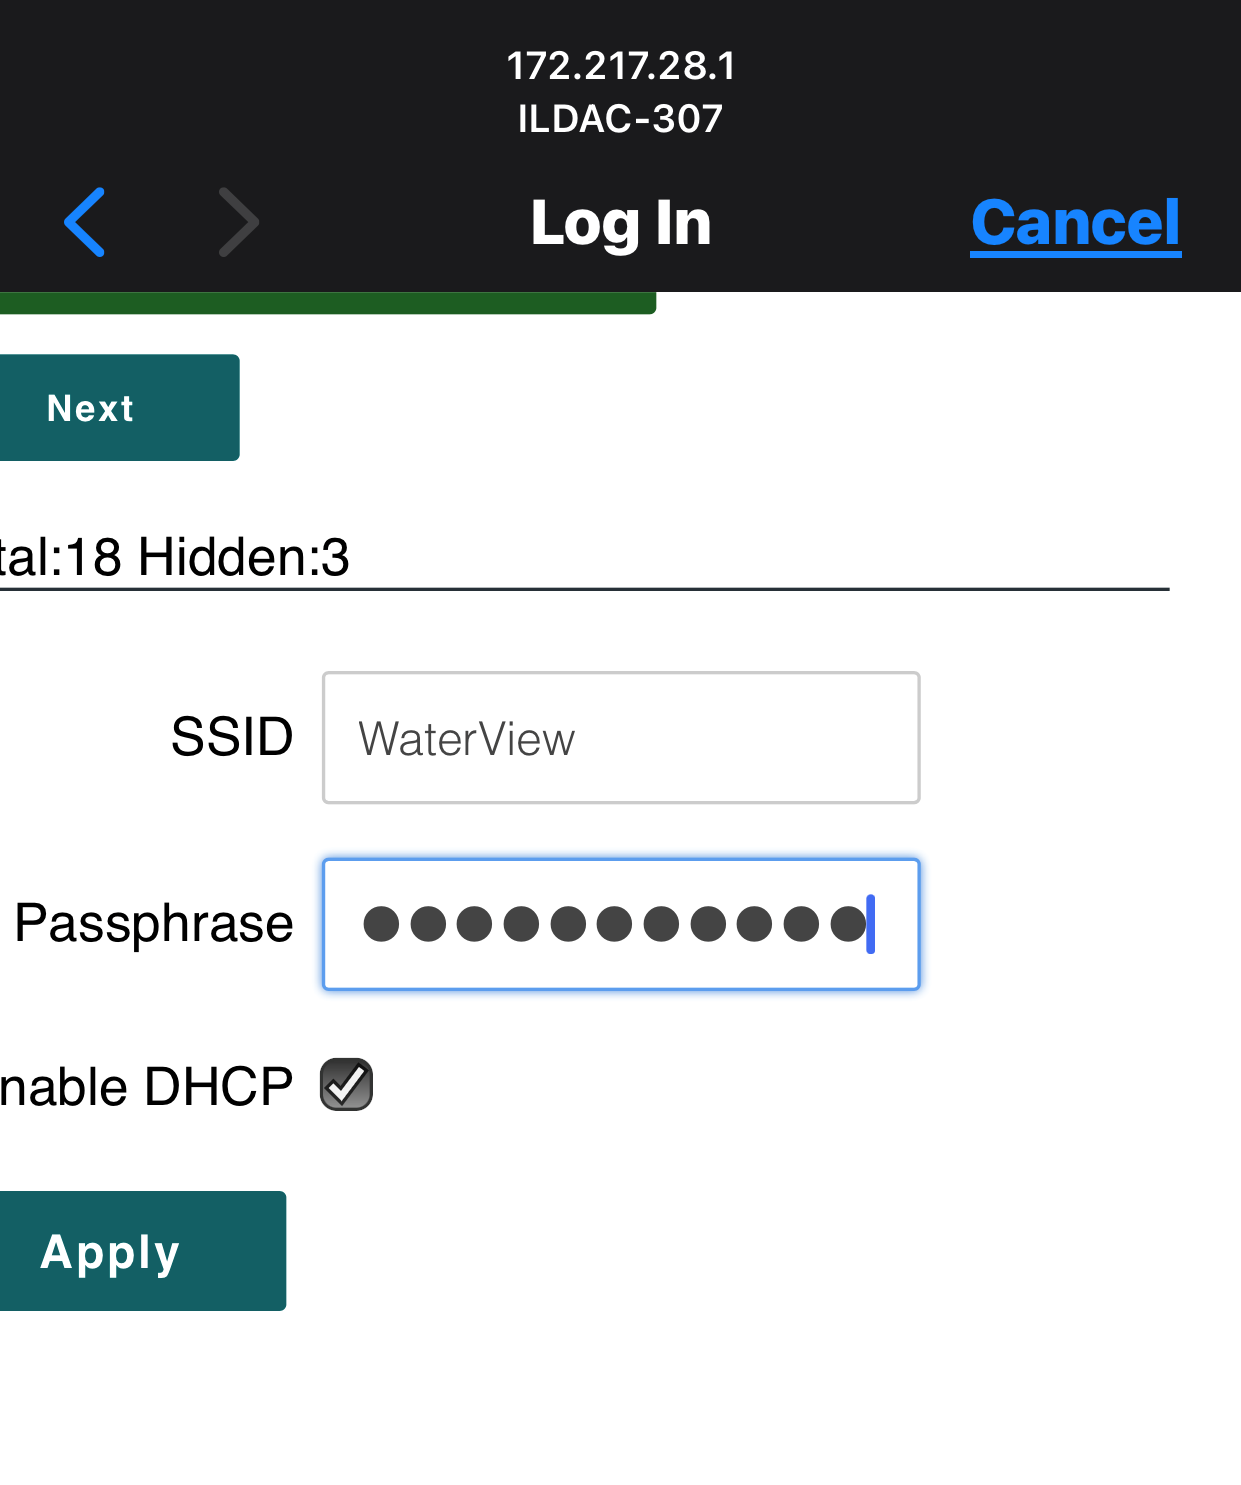
Select your network SSID (green bar), and then enter your Wifi password and click "Apply".
Once the ILDAC-32 successfully connects to your Wifi network, you'll see the page below on your phone. Also, ILDAC-32 will reboot and connect to your WiFi network. Take note of the IP address on this screen -- it is the local IP address you can now use to connect to the ILDAC-32 using any web browser.
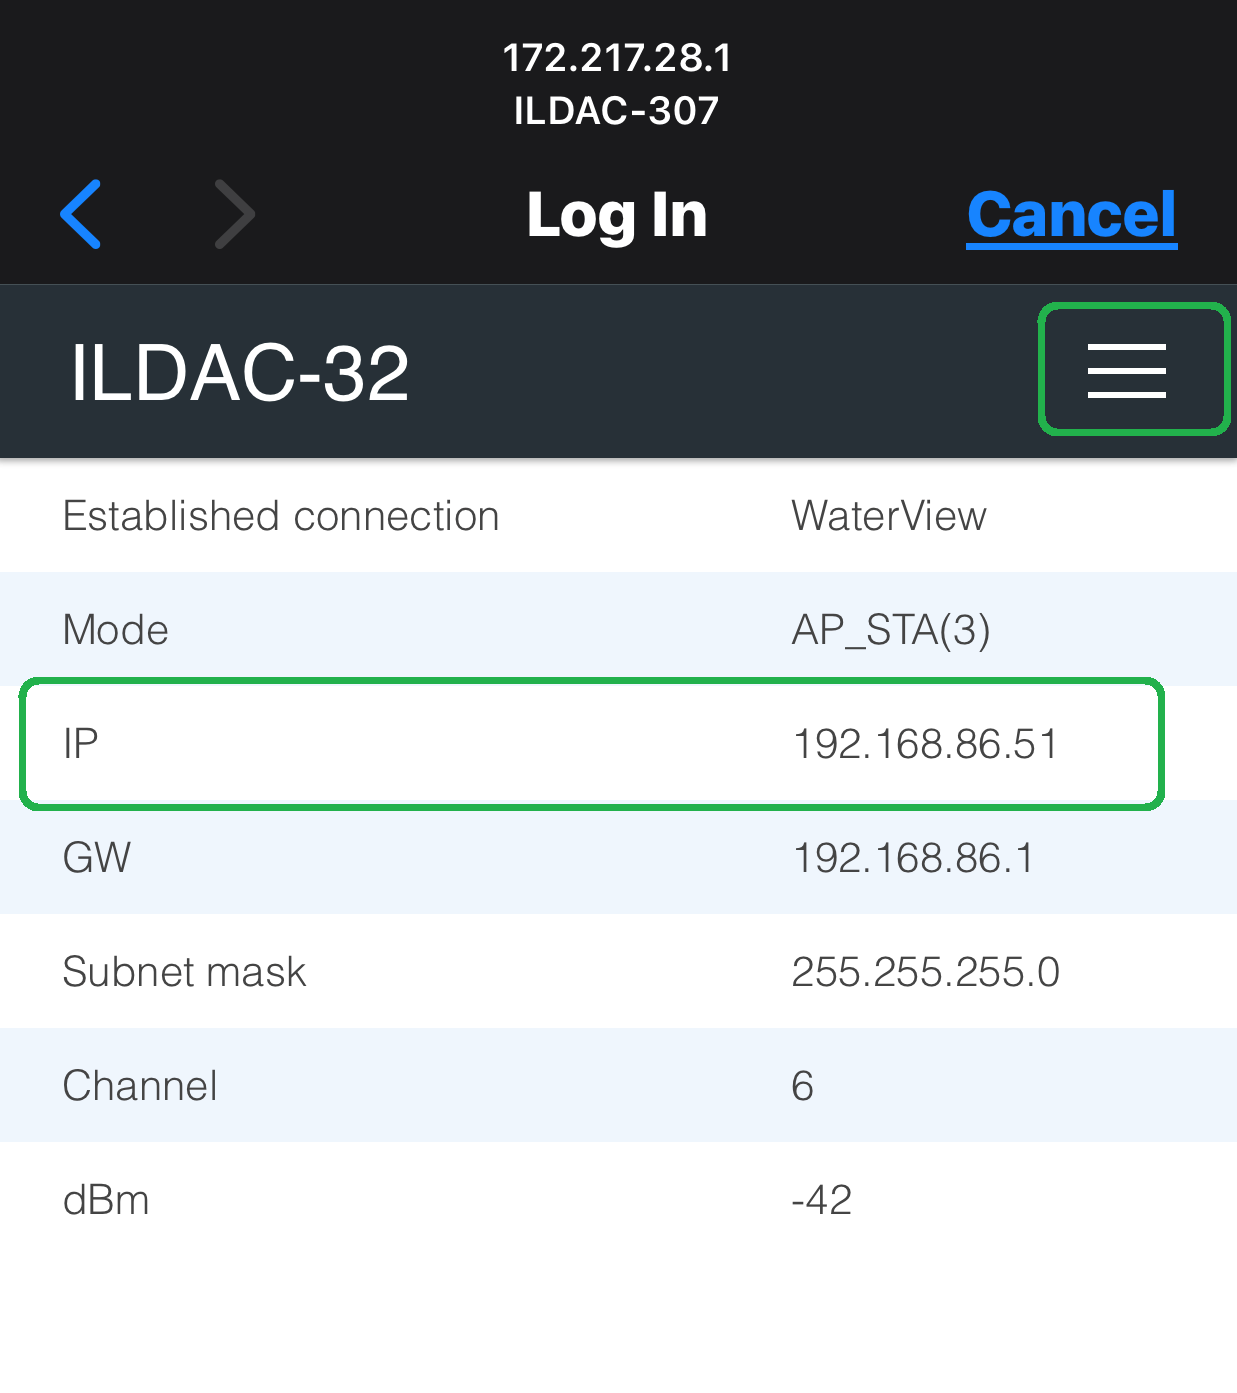
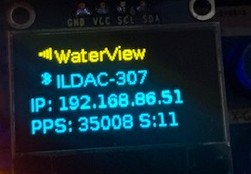
The OLED display will also indicate the SSID and local IP address to use to open the internal web browser. In this mode the display lines are:
Line 1(yellow): Your Wifi SSID.
Line 2: Bluetooth device ID.
Line 3: Local IP address to connect to ILDAC-32.
Line 4: Current Points-per-second (PPS) being displayed and the total uptime in seconds (S).
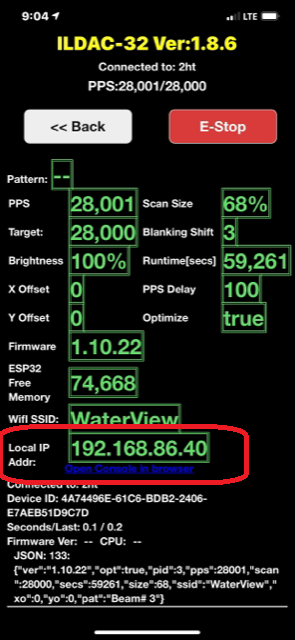
You can also get the IP address of the internal web browser by looking at the "Dashboard" in the Mobile app, like below.
There's also a link below the IP address to open ILDAC-32 in the web browser of your mobile device.
Once you go through these steps to configure your local WiFi network, you won't need to do it again. Every time you start ILDAC-32, it will automatically try to connect to your Wifi network. Watch the OLED display for startup status information.
If you are out of range of your local Wifi network, you can open the Mobile app and go to: Configuration-->Disable Wifi Portal to turn off Wifi so the device only starts in Bluetooth mode and does not try to connect to Wifi.
If you are ONLY using ILDAC-32 at your location on your own Wifi network, once you connect to the web app, you can click: "Bluetooth Disable" to turn off Bluetooth and free up some memory to run larger animated ILDA files. If you aren't running large ILDA files, you can leave Bluetooth enabled.